Rekindle Your Love of Photography - 5 Tips
You probably don’t need a better camera, you just need a few tips and some inspiration!
Whether you have just invested in a new good quality DSLR or Mirrorless camera or you have had one for some time now, do you find that you are disappointed with the photos that the camera takes? Did you expect better results when you bought it? Have you become a bit despondent about photography because of it?
There is no doubt that cameras are producing better and better images as they advance technologically year after year, but what I often see happening is that people do expect magical photos straight out of their camera - just like they see in the camera company’s marketing material, and they also expect the quality of images to be in direct relation to the money they’ve invested in their gear.
 I have often been asked by people who are dissatisfied with their results about what camera to buy to fix the problem. It is a simple mistake - they see my big pro cameras and see my galleries online or in local exhibitions and make the logical assumption “I need a better camera” when they really just need to handle some Photography Basics.
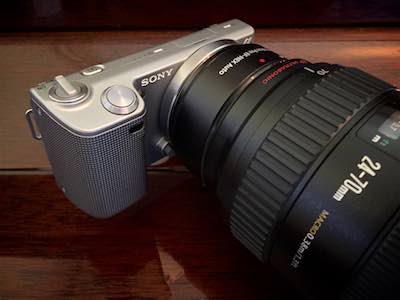
I’ve just bought a secondhand revamped Sony Nex on eBay to use in my online photography tutorials so that students can relate to what I am teaching and not be intimidated by my big gear (I also need to understand the gear that my readers and students are working with). I was amazed at the variety of secondhand gear available…I wondered if everyone was selling because they are upgrading…and how many of these sellers have just lost interest in these lovely mid range cameras because they didn’t produce the results they expected?
Here are 5 creative and technical tips to get you interested in your photography again - whatever your camera is!
Tip 1 - Exposure Settings for Dramatic Effects
Never leave it to your camera to decide what the best exposure is for your shot. I harp on this a lot but this time it's for the opposite reason! Sometimes the difference between a plain photo and wow shot is intentional over or under-exposure. There are two ways to set this up - either way you need to take your camera off Auto (if that is your standard setting) and switch to either Program, Aperture Priority, or Shutter Priority mode to access the necessary controls.
Option 1. AEB - Auto Exposure Bracketing - set your camera up to take a number of shots at different exposures automatically. From there you can choose the best looking shot from the range of over and under exposures. Go into the menu setting to find AEB. Depending on your camera model, you’ll probably choose bracketing with 3 or 5 images, and half, full or 2 stop increments. The camera will then take a series of shots at different exposures for you to choose from.
Option 2. EV - Exposure Compensation - This is my preferred option and the quickest and easiest way in my opinion - you’ll notice the EV gauge in the viewfinder and LCD info screen. Find the dial or control to make adjustments and away you go - take as many various over and under-exposures as you like by adjusting the dial that controls the EV - check your results in the preview, and take some more if you like! It’s also great for correcting exposures at any time.
Now for the creative side - check out photos by other photographers for ideas, see how interesting under and over exposed images can look - see how moody and interesting they become. Find interesting locations and subject matter, use the sun or available light and shadows to your advantage - you'll probably discover that high contrast scenes work best most of the time, and don’t be surprised if you manage to take a great shot just in your own backyard!

Tip 2 - Using Depth of Field for Focus and “POP”
Choosing your aperture intentionally is probably the first and most important decision before you take any shot - it's pretty standard practice in photography but why not take it to the next level!
Intentional blur is a creative choice which directs the viewer’s eye to what's in focus in an image and makes your images pop. Setting a wide aperture will cause a shallow depth of field. In other words, when setting a low number f/stop (like f2.8 or 3.5 or 4) what you focus on will be sharp and the foreground and background - everything not at that focal length - will be out of focus.
Set your camera to Aperture Priority Mode ( AV, or A on the dial) and choose lower number f-stops while making sure that your chosen f/stop does not cause over exposure - you camera will warn you if it can’t set an appropriate shutter speed for the aperture you’ve chosen. If this happens simply adjust your aperture to a bigger number - though this will lessen the effect you are wanting to achieve.
If the available light is very bright, you may not be able to set a wide enough Aperture to create a shallow depth of field. Make sure your ISO is at 100 or as low as it can go - this will ensure the widest possible f-stops. A Neutral Density filter is the next solution if the daylight is too bright - though choosing a later time of the day may be a better solution.
There will be times when you have the widest aperture/lowest number stop set and the depth of field is still huge - everything in the scene seems to be in focus. Here are 4 tips to create the best blurry backgrounds possible.
1. The subject that you are focussing on needs to be close to the lens - not 20 feet away.
2. Keep your background as far away from the subject as possible - the more distance - the better the blur.
3. Use a large focal length lens - or zoom out as much as possible - wide angle lenses don’t work well.
4. If you have a macro setting or macro lens, get up real close to you subject and experiment - you'll get super shallow Depth of Field with macro/ closeup settings.
Play around with these points and you’ll be surprised how much you learn and remember for next time.

We have some great free cheat sheets on Depth of Field, Exposure Settings, Shutter Speed and Aperture Settings. Grab them at: https://www.greatphototutorials.com/store/5FceiB26
Tip 3 - Challenge Your Awareness of Your Surroundings
One of the joys of teaching photography is seeing all the different subject matter students discover and the vastly different ways they capture the same scene when on a field trip.
Start thinking outside the square, notice the small things, and how things look if you move around just a little. Look for different angles, different crops, color combinations, textures, lines, shapes, shadows, reflections, space. I could produce a coffee table book just from my backyard…there are so many ways you can capture a leaf…Find something simple and play with it.

Tip 4 - Develop Your Personal Style
Bring out the artist in you! Have you ever thought about what type of photos you like taking best? What gives you the most joy…is it kids portraits, landscapes, macro, food photography? Are you inspired by Black and White photography?? Do you want to take amazing photos on exotic travels, or just capture images as art in any situation?
Develop your own style by experimenting with different subject matter and different techniques. If you have no idea, I think the best way to get started is to have a look at what other photographers are doing…don’t be intimidated - be inspired!!…And don’t hesitate in using their ideas as a base for developing your own unique style.

Tip 5 - Break All the Rules
Tack sharp photos are paramount right!? Have you ever seen any awesome images that are just a blur? I have, andI have created them - usually by mistake (I am usually a ‘tack sharp’ addict)…but what about doing it on purpose.
You’ll need slow shutter speeds and you’ll need to experiment with the shutter speed against the camera movement to get enough blur for effect…no rules…the objects in the image may still be identifiable, or not…
To get the slow shutter speeds required (1 second or more), you’ll need to do one or more of the following:
- Keep your ISO as low as possible - 50 or 100 (don’t set it to auto!)
- Keep your Aperture as narrow as possible (highest number f/stop)
- Choose a low light location or dark cloudy day with the 2 settings above
If you can’t get the shutter speed low enough, use a Neutral density filter (or try your polarising filter if that’s all you have - it will slow the shutter down by around 1 stop)

Lastly, I want to let you in on two secrets…
Firstly, in reality, we Pro Photographers take more ordinary and disastrous shots than you do! We are always experimenting…trying new things…and DELETING the dud shots so we don’t blow out our card and computer storage space. Delete the bad shots and only show off your successes.
Secondly, all great photos (including the ones you see in the camera company promotional materials) have been edited after upload. Not every photo can be turned into a masterpiece with post processing though, you do need to have a good quality base image to work with, but we judge a photo when we’re checking it in the camera’s preview screen by knowing what the image will probably look like when finished off in post processing. There is the occasional pleasant surprise though - sometimes you just never know how great a pic can end up after editing! We're always learning.


So, if you want to take great photos, experiment with the tips listed above, start taking lots of photos, delete the dud shots, and get interested in photo editing!
Grab your camera - get up and get going - have some fun!
And....Get the Basics!...https://www.greatphototutorials.com/p/photography-basics

Comments and Questions...

Join Us on Facebook!

Recommended Apps

Free Stuff!!


Online Courses